


Congratulations on your purchase of a new GODMODE PC! Now that you have your new PC, it's time to get the system setup. Follow these steps so you can get to gaming in no time:
Unpacking your PC
Firstly, before you open your packaging, make sure that the box is facing the correct side up, you can tell based on where the Godmode tape is, we always use the tape on the top of the box. Now you can cut open the packaging tape to get inside of your system. The easiest way to get the PC out of the box is to place it upside down on a bench or table then slowly lift the box off the PC. When opening the packaging you will find the following items inside:
- Your PC.
- An accessory bag with extra items that were included with your original components.
- Any optional peripherals you purchased with your system (Monitors are shipped in separate boxes.)
Getting your PC fully hooked up
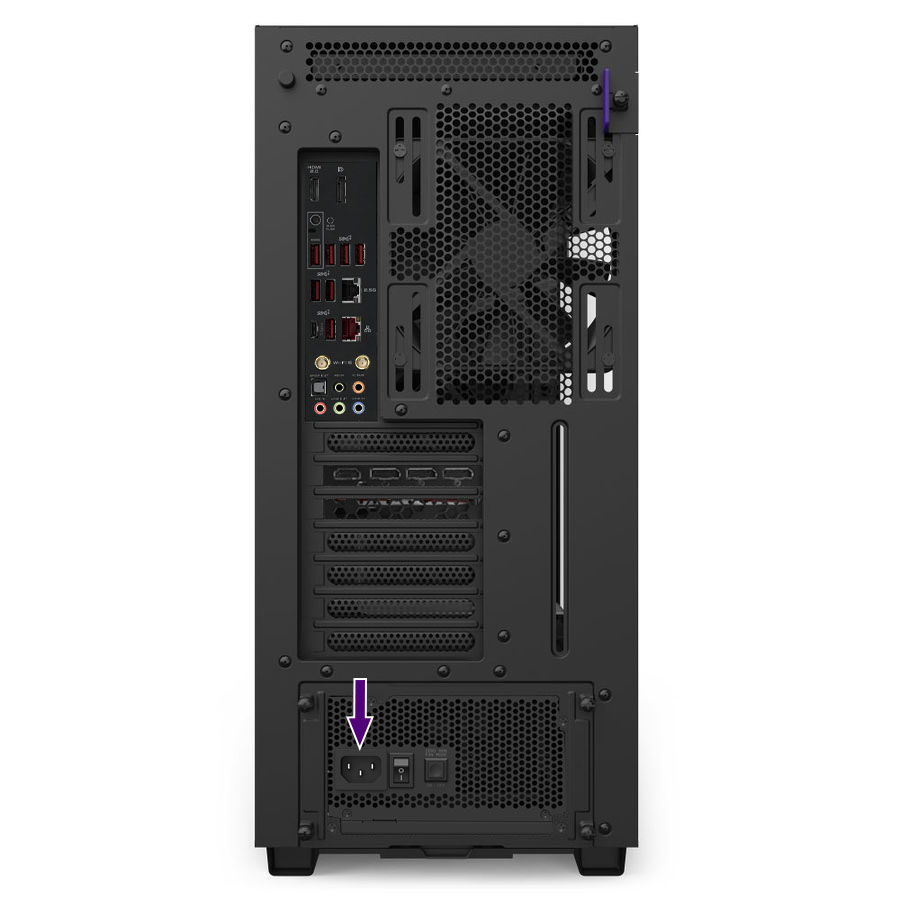
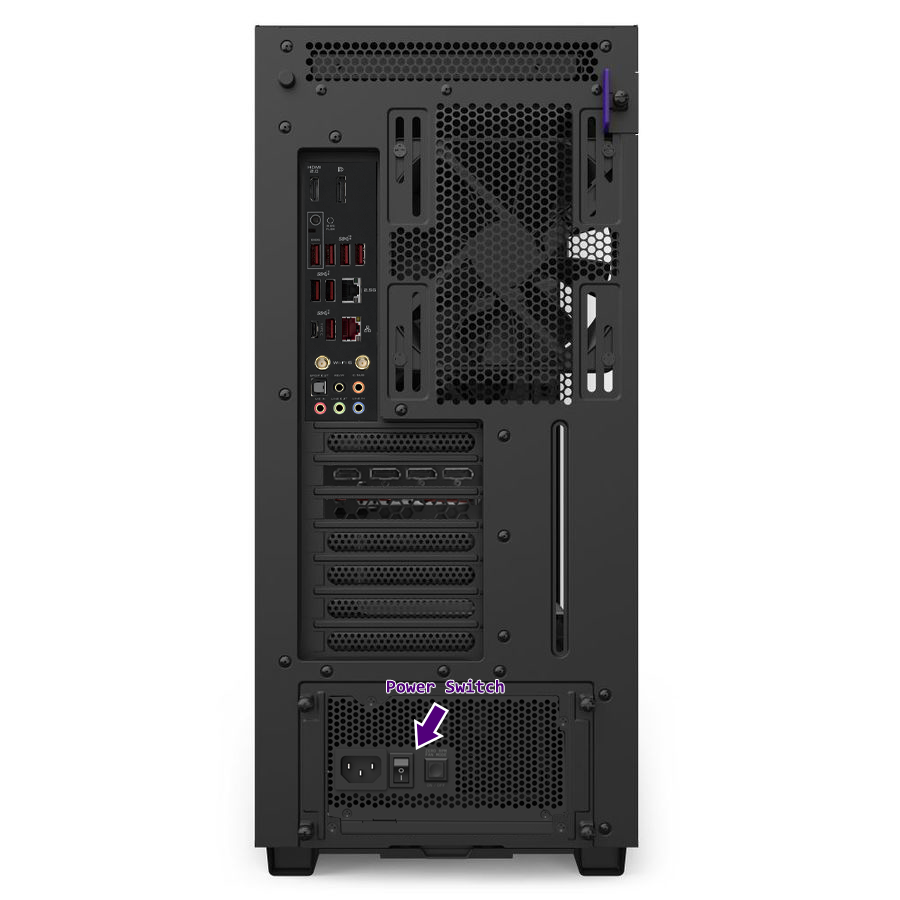
Now that the PC has been removed from the box you can now hook up the power cable. The power cable will connect to the port on your power supply show in the photo below.
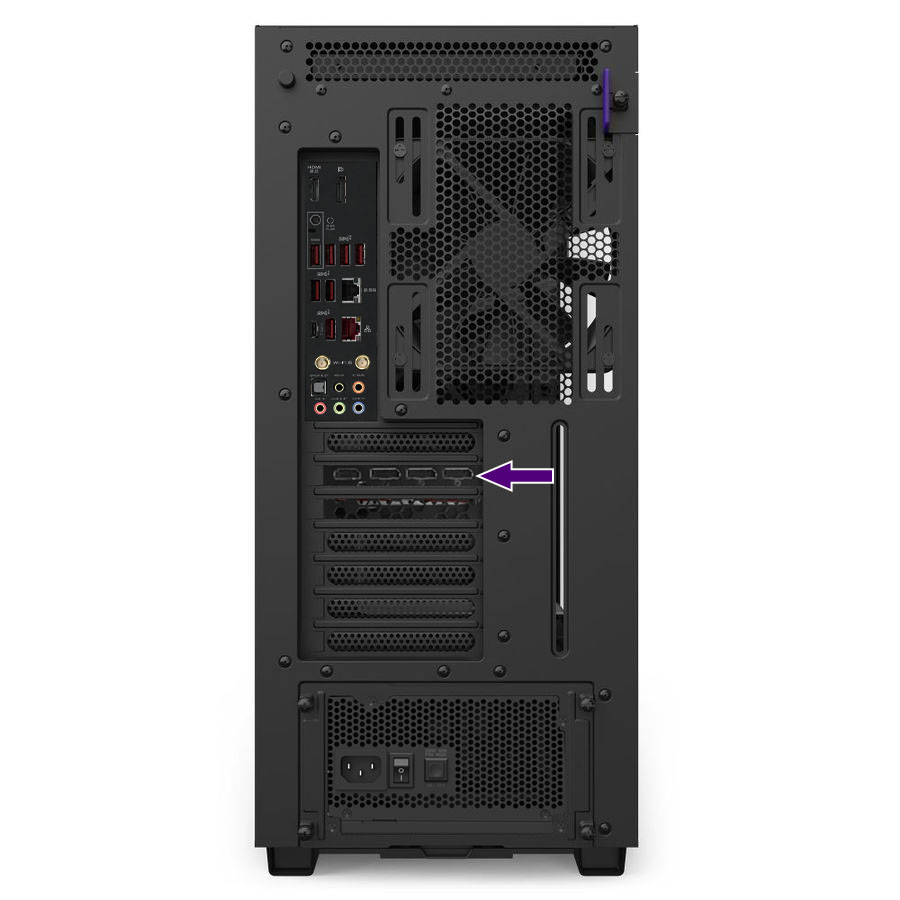
Next, you will attach the Display cables to the GPU (aka the graphics or video card). The GPU is the horizontal slot about halfway down the back of the PC as shown in the example below. You will need to use either a DisplayPort (left) or HDMI (right) cable to connect the system to your monitor.
*Note - If you see "no signal" on the Monitor after plugging it into the GPU shown in the photo below, you may need to reseat the RAM. You can follow this guide that will show you the process.
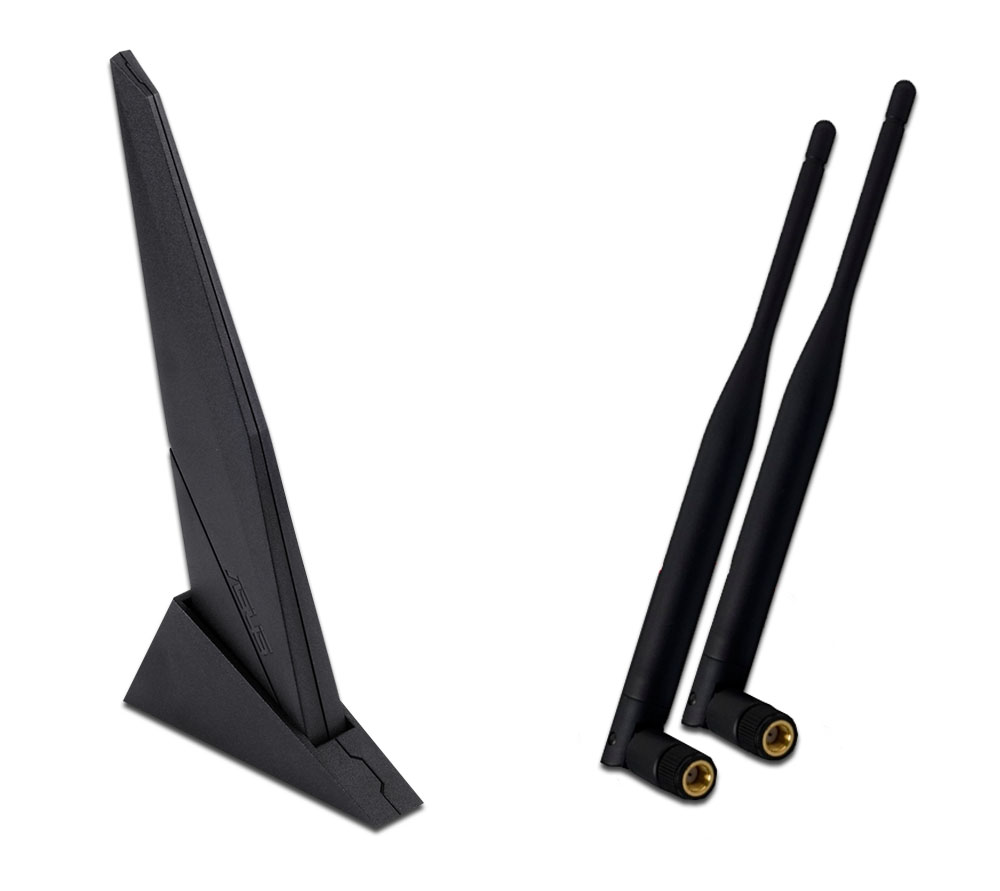
Now if you have purchased a system that is WiFi/Bluetooth Capable, you will also need to connect the included wireless antenna. Unlike phones or laptops, most gaming PCs need an external antenna to be connected in order to use WiFi or Bluetooth. Without these antennas, your PC may have poor reception for wireless connections or may not even be able to connect at all. You can find examples of these in the photo below.
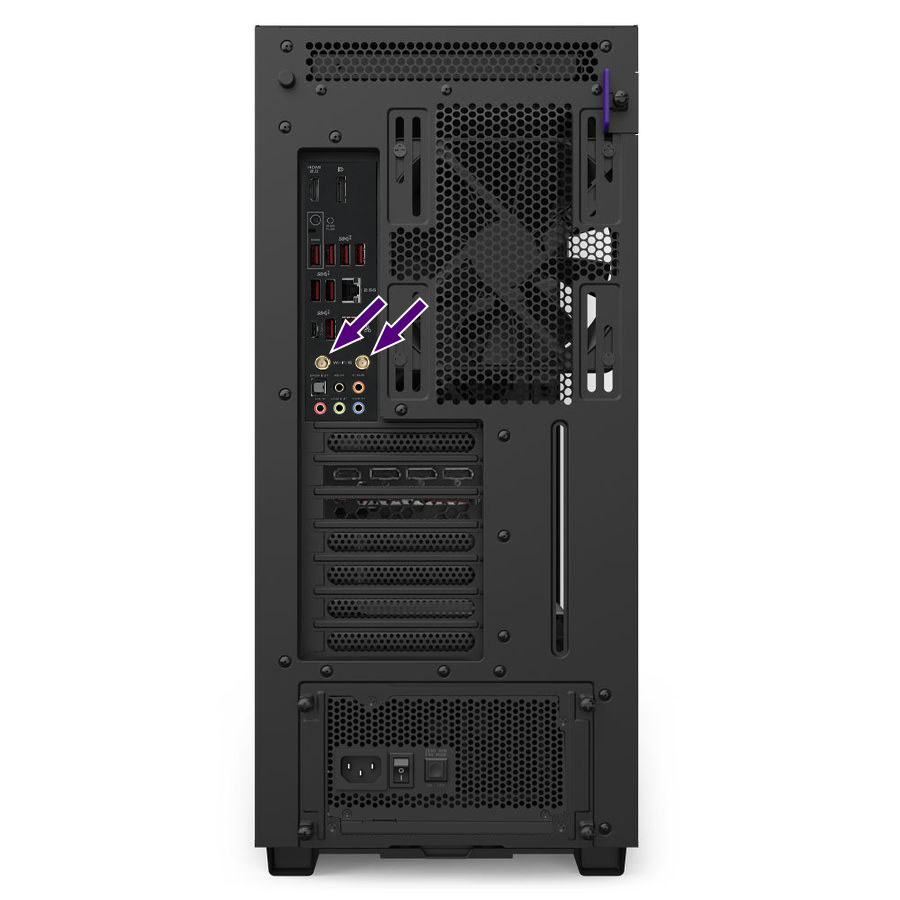
Once you have located your antenna(s), installation is easy, there will be two brass connectors on the PC that you will be able to screw onto the antenna(s). This is shown in the example below.
Now that the PC has the power cable, display cable, and possibly antennas installed, you are now able to power on your PC. Make sure the switch next to your power cable is in the "I" position. (Pictured below in the "I" Position).
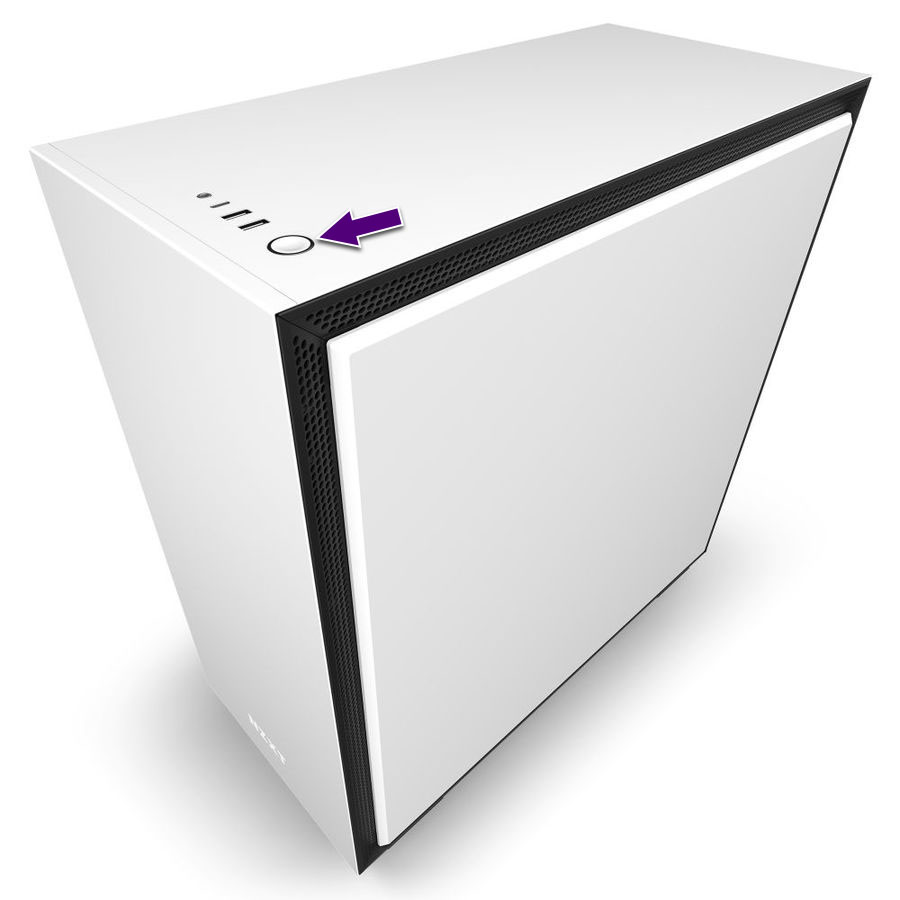
Then on the top of the case, firmly press the power button (as pictured below.)
Your PC should now show signs of life: fans spinning, lights, and a display on your monitor! That means you are all clear to hook up your peripherals (keyboard, mouse, etc.) to your PC. You can also now attach your headset or speakers to the system in either the front or rear audio ports. Please note that in order for your headset to have both your headphones and microphone enabled you will need to either use a split headset with 2 inputs or a USB headset. Single jack headsets may work for one or the other, but may not work at all.
You are now free to connect to your Home Wifi/Ethernet connection and start downloading games. Have fun!
If you have any questions or require assistance, feel free to contact tom@godmode.co.nz

